I’m teaching a class on Mold Making and Plastic Casting at NovaLabs in Reston. Yesterday, I made a simple two part mold using something I designed in Fusion 360 and 3D printed as the model.
Here’s how it’s done.
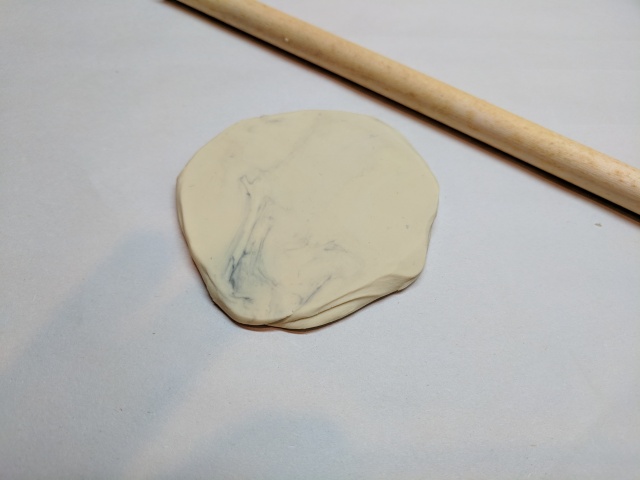
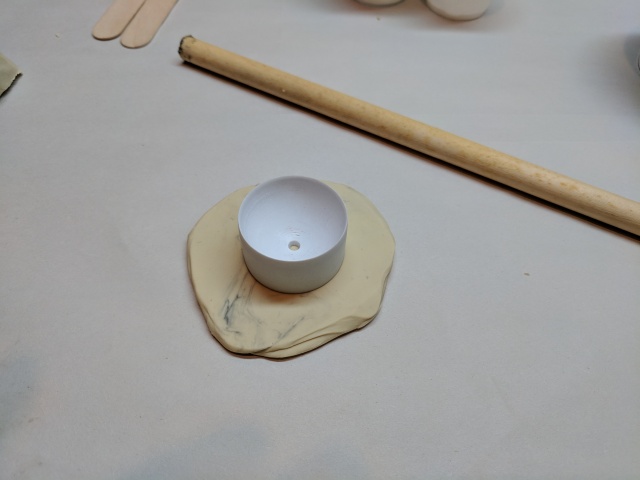
Clay Bed
Start by rolling out a clay bed big enough to hold your model plus 1/4″ to 1/2″ of additional space. If you’re using platinum cure silicone for the mold, make sure your clay is sulfur free.
We’re building the mold upside-down, so the clay bed will become the top of the mold. Make sure the bed is thick enough to yield a sturdy top mold half.
Seat Your Model
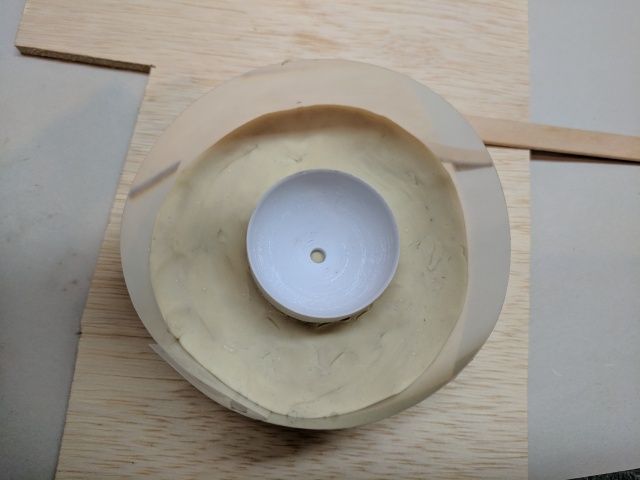
Place your model on the clay bed. In this case, the model is fairly simple and has a flat bottom. I just pressed the model into the clay to ensure a tight seal around the bottom.
If your model is more complicated, you might have to lay it on its side and build the clay around it.
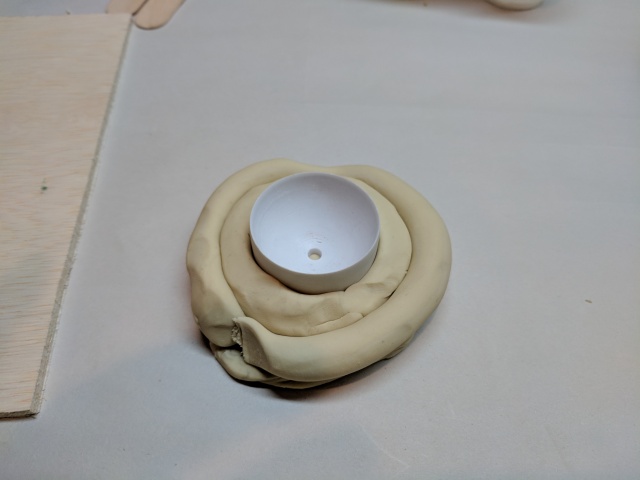
Build Up the Clay
Add clay around the model. How much clay didn’t matter much in this case. I just needed enough to hold the model firmly and to make the registration keys (see below).
If you’re making your mold with your model on its side, you would typically add clay up to the halfway point. Depending on your model, it might be easier to start with a thick clay bed and hollow out a cavity for your model.
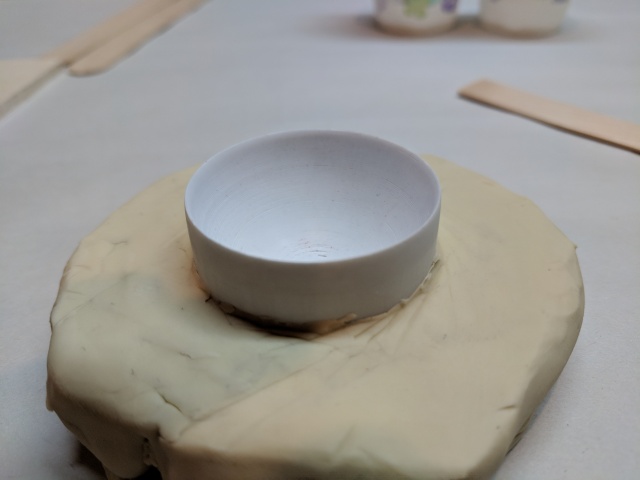
Smooth the Clay and Seal the Model
Carefully smooth the top of the clay bed. I start with a craft stick to level out the major lumps, then use my finger to cover any cracks and smooth the surface.
Make sure the clay is sealed up against the model. You don’t want silicone running down a crack between the clay and the model.
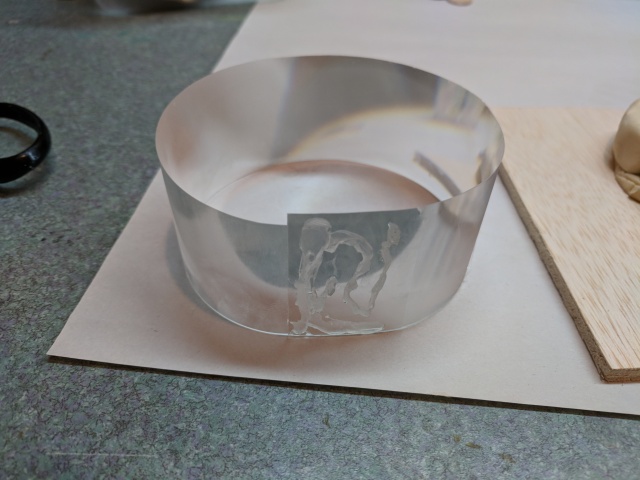
Make Your Mold Box
Here, I’m using a simple ring of stiff plastic I hot glued together. This is an easy technique which works well for vertically molded, roughly cylindrical models. You can just wrap it around your clay bed and seal it tight.
For non-cylindrical models, you can make a box out of foam core and hot glue. You can either build it around the clay bed or start with the clay bed in the box. Whichever will be easier.
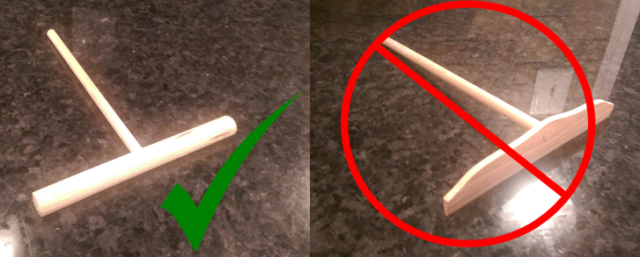
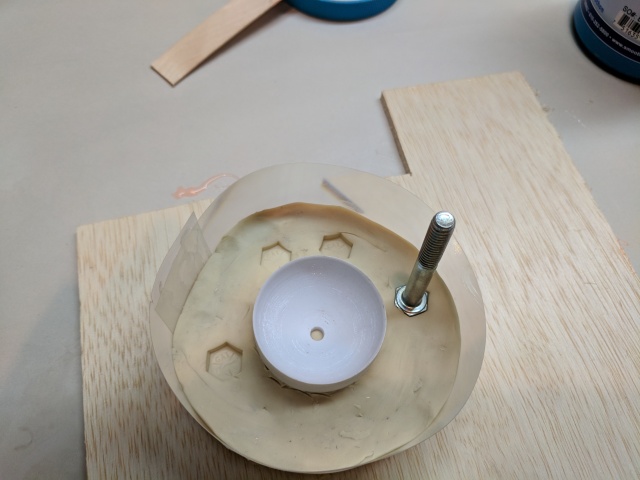
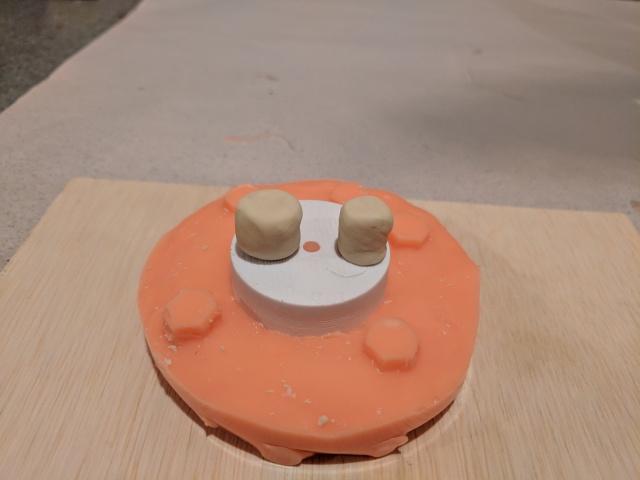
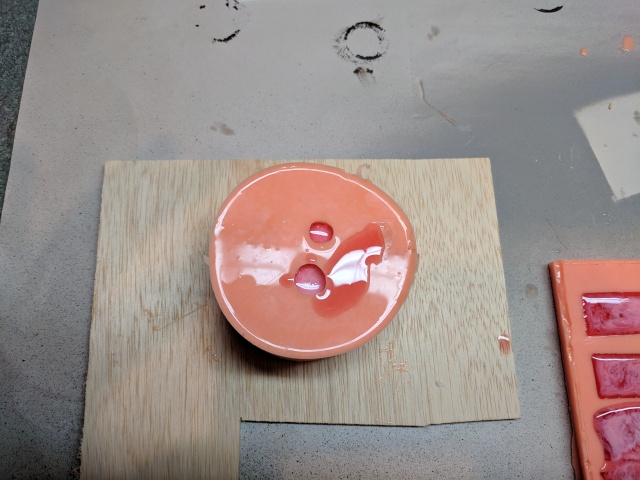
Make Registration Keys
Registration keys help you line up the two halves of the mold, ensuring a tight fit and minimizing flashing. You make them by either creating holes in the clay bed or sticking small objects, like marbles or acorn nuts, into it. When you pour the silicone for the bottom half of the mold, it fills the holes or flows around the objects, creating the male or female half of the key depending on which technique you used. When you flip the mold over to pour the top half, that silicone will make exact negatives of the bottom half features, completing the keys.
Notice that I arranged the keys asymmetrically, with two keys much closer to each other. Since the mold is circular, this will make it easier to line the keys up. If I’d spaced them evenly around the perimeter, it would have to confusing when reassembling the mold.
Here I’m using the end of a hex bolt to put holes in the clay bed. I didn’t like the results. It distorted my carefully prepared clay bed and the keys came out sloppy.
Next time, I’ll use acorn nuts. I think they’ll give me sharper registration keys and keep the bed level at the same time.
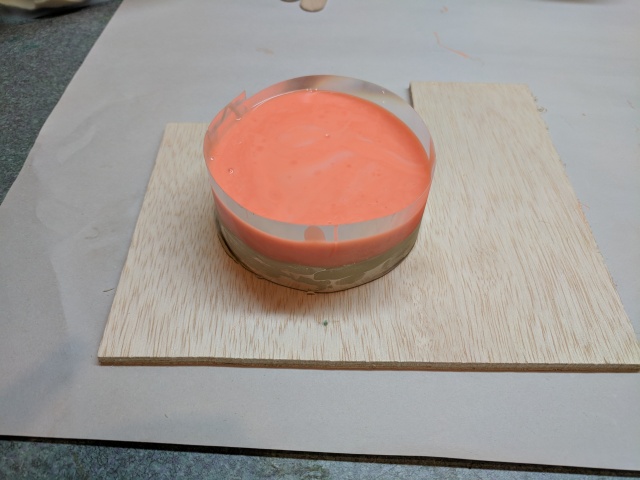
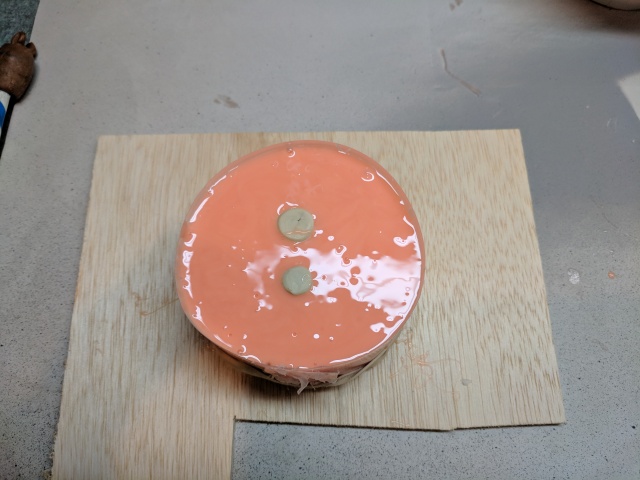
Pour the Silicone
Mix parts A and B of your silicone rubber, as usual, and pour into the mold box. Pour it in a thin stream, into the lowest part of the mold box. Let the silicone ooze around, up and over the model. This will help ensure air bubbles don’t get caught in any undercuts.
Make sure the top of the mold is thick enough to withstand the number of castings you want to make with this mold. A thin mold will tear or wear out more quickly.
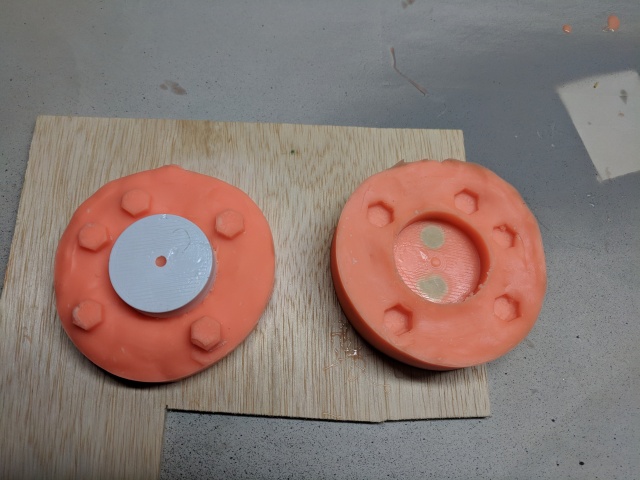
Remove the Clay Bed
Once the silicone is fully cured, flip the mold over. This is now the bottom half of the mold.
Remove the clay bed. It will be hard to get started. You’ll have to dig in with a spoon or your finger to pull out a piece of clay so you can peel the rest away. Once you get it started though, the clay should easily come out cleanly, in large pieces.
Clean out any residual clay using a toothpick or brush.
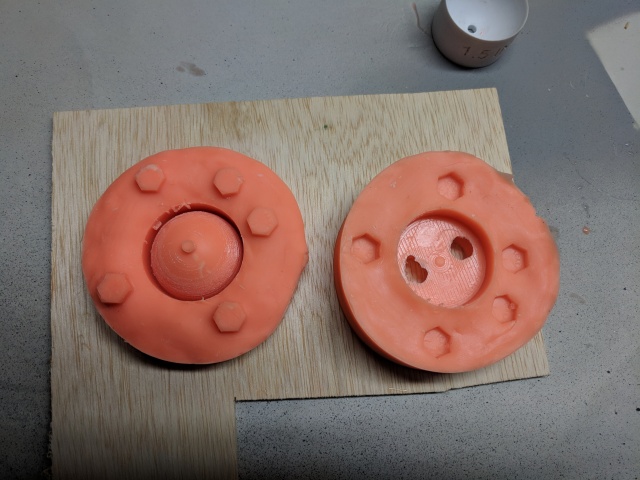
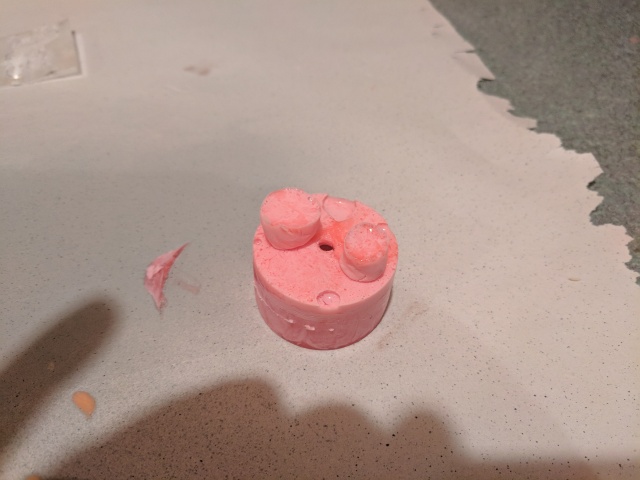
Make Pour and Air Escape Channels
Using your clay, make two pipes; one for pouring the resin, the other for letting air escape the mold. I could have just 3D printed the channels as part of the rest of the positive. That would have been easier.
Note, here I’ve taken the plastic ring off the mold. That was a mistake. It was a pain to get it back on tightly enough the second pour of silicone won’t leak out.
Apply Mold Release
Since you’re pouring silicone onto silicone, you have to use mold release. Otherwise, you won’t get a two part mold. You’ll just get a single block of silicone with your model trapped inside.
Mann Ease Release 200 is a reliable product. Apply a light coating, making sure you cover the entire surface of the mold. I usual spray it outside because it leaves a distinct petroleum smell I don’t like in the house.
This is a very fine aerosol. It won’t look like there’s anything on the mold. Resist the urge to apply a heavier coat.
Using a soft brush, lightly brush the surface of the mold. This breaks up any droplets and ensures complete coverage.
Give the mold a second light coat. Allow to dry for 30 minutes.
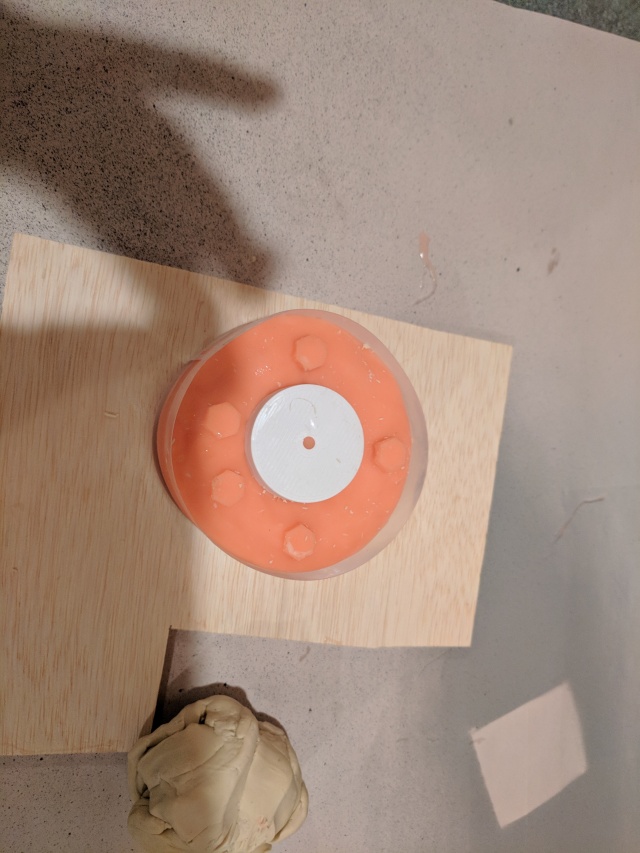
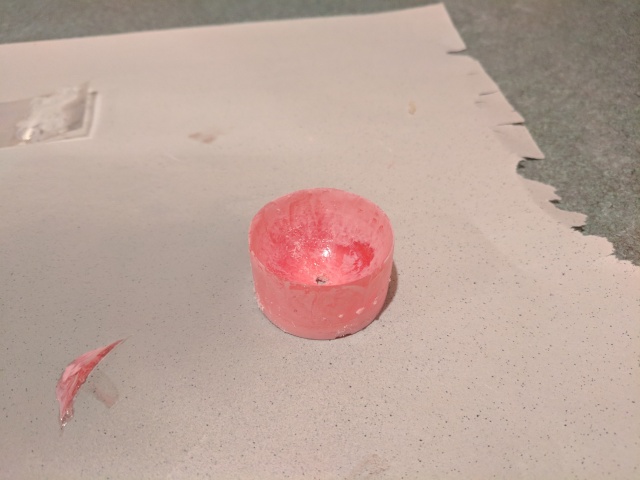
 Pour the Top Half of the Mold
Mix the silicone parts A and B and pour the top half of the mold. Fill the mold box just to the top of the pour and air channels.
 Remove the Model
Remove the mold box . The two halves will be firmly stuck together. This is because they are exact negative copies of each other. They fit together as tightly as anything can fit together.
Don’t worry. If you applied the mold release correctly you can get them apart by finding the seam between the halves and pushing on it with your fingernail. Once you get a small separation between the halves, they should peel apart.
Remove the model and any remaining clay.
Cast Your Part
Reassemble the mold halves. Mix parts A and B of your resin and pour.
Demold Your Part
It should be much easier to separate the mold halves this time. Pull them apart and remove your part.
I used some Smooth-Cast 325 I for this pour. It was old and there was too much part A so I just wanted to use it up. I tinted it with So-Strong red. It didn’t come out great. It’s taking forever to cure and the surface finish is poor.
Finish Your Part
Cut off the pour and air channels. Depending on what resin you used, you can sand down the cut marks to get a smooth finish. Hard urethane resins sand well. Softer urethane and epoxy not so much.
That’s it. You’re now ready to cast dozens or hundreds of your part.